The success of a CS2 (CS:GO) player is determined by many factors, such as individual performance, ability to play in a team, player experience, and, of course, the speed of information processing and decision-making. One of the main sources of information is the radar and in this article, we will tell you how to make your radar settings as convenient and informative as possible.
In article you will find:
CS2 (CS:GO) is a very well-balanced game, and there are no legal tools that would give you a significant advantage. But several settings can give you, albeit scanty, but still an advantage. A properly tuned radar is one of them.
 Advertisement
The more information you can get from it, the faster you will make a decision. This will allow you to get ahead of the actions of the opponents and instantly find the right options for countermeasures.
As with any customization feature, the radar in CS2 (CS:GO) can be customized in two ways. The first and easiest is to go to the in-game settings. There you will be able to adjust the HUD size, radar map zoom, and radar map orientation.
The second way gives you more options. This is the radar setting through the console. Using these settings will allow us to create our own CS2 (CS:GO) radar. We recommend the second option because of its variability.
Let’s see which console commands you should use to set the best radar setup for you.
It is also worth mentioning that all console commands used below can be changed through the config file. If you do not know how to do this, we advise you to read our article about config.cfg.
We advise you not to enter console commands all at once. Do this one at a time. That will reduce the chance that you will make a mistake somewhere when entering.
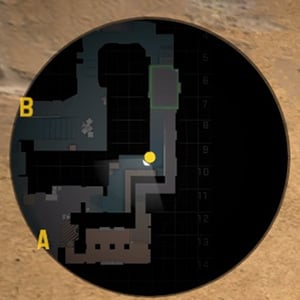
This console command increases or decreases the zoom of your radar. Valid values are from 0.3 to 1.3. The lower the value you set, the larger the area of the map will be displayed on the radar.
On the first photo, the value is cl_radar_scale 0.6, and on the second cl_radar_scale 1.3
With this console command, you can reduce or increase the size of the radar on your display. The first photo was taken with a minimum cl_hud_radar_scale of 0.8 and the second with a maximum cl_hud_radar_scale of 1.3.
This command changes the size of your dot on the radar. It varies from 0.4 to 1. The default value is 0.6, but the first photo shows an example with the command cl_radar_icon_scale_min 0.4, and the second photo shows the maximum magnification of the dot cl_radar_icon_scale_min 1.
If you do not see any changes when entering this command, it means that you most likely have the maximum zoom on the radar. Try reducing this a bit with cl_radar_scale, as shown above.
This command is responsible for centralizing the radar towards you. When you stand on the edge of the map, and you have set a value of 0, then you have more space for review. The selection ranges from 0 to 1.
On the first photo cl_radar_always_centered 0, and the second cl_radar_always_centered 1.
This function disables or enables the rotation of the map on the radar relative to your mouse rotation. Many players turn off the rotation of the radar because, in their opinion, it is easier to navigate the map, but you decide how it will be more convenient for you. Available values are 0 and 1.
In the first photo, the radar is static, and in the second, it is dynamic.
Simple Radar is a community-created mod that replaces your in-game radar and makes it more usable. They use a more contrasting color scheme to speed up the perception of information by the user. On it, you can add the name of positions on the mini-map, and highlight the contours of the bombsites, spawns, etc.
This mod is not prohibited software, so you don’t have to worry about the ban. It is allowed to be used in regular matchmaking and on the FACEIT platform.
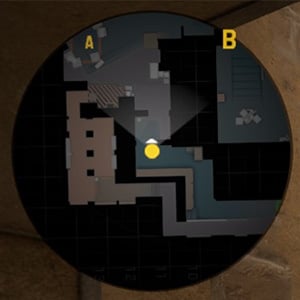
Since the general function of the radar is to receive information from it, you need to maximize the field of view. It also needs to be made static so that your movements do not affect the mini-map in any way, and it will always be in the same structure. To do this, enter the following console commands:
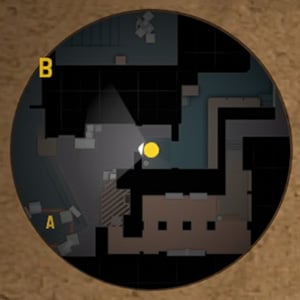
Here’s how it will look like in-game:
You can also customize any of the above commands for yourself, thus making your ideal radar.
 Advertisement
Previously, CS2 (CS:GO) had an interesting feature related to the radar. When the smoke was dispelled, the enemy icon on the minimap was displayed faster than you could see the model on your screen. To do this, the players used a bind on the radar zoom.
Although this feature has long been removed from the game, the bind is still used by the players. For example, s1mple said in one of his interviews:
“On the «C» key, I have a radar zoom bind. If necessary, I can make it more or less.”
bind c incrementvar cl_radar_scale 0 1 0.25
Most likely, the s1mple uses this bind when he realizes that he no longer needs extra space on the radar. For example, when you need to repel an enemy attack on one of the points or retake the site.
Other pro players also use this bind, for example, Jonathan “EliGE” Jablonowski and Boris “magixx” Vorobyev.
Many players, especially new ones, often ask the question: Why don’t developers make the radar the best by default? Why do we have to configure it ourselves?
The answer is pretty simple. Any settings, be it mouse sensitivity, screen resolution, or hotkeys, are purely individual for each player. All settings, according to the standard, should introduce the player to the game, and then he must, in the process of developing skills, adjust them for himself. The same goes for radar settings.
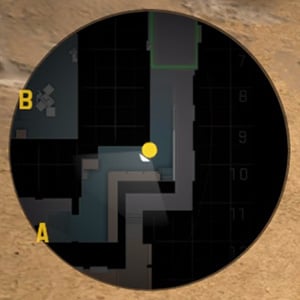
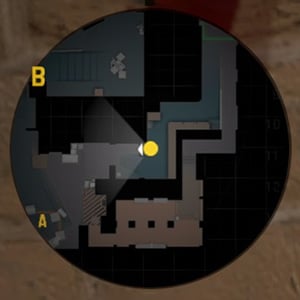
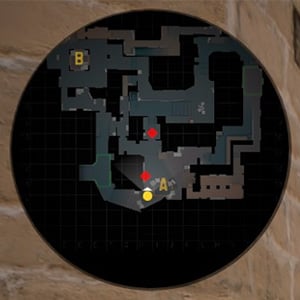
Here are the default radar settings:
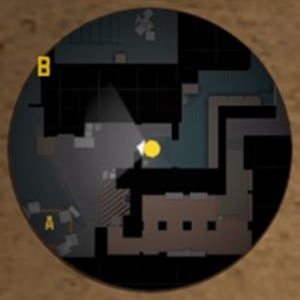
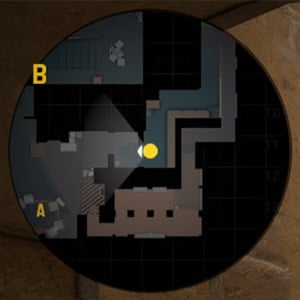
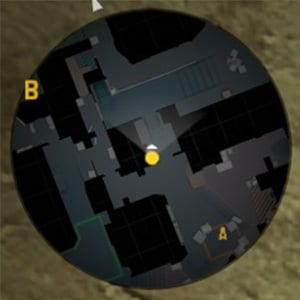
And now compare to the custom radar settings:
As you can see the difference is huge. With the help of a custom radar, you are able to see the activity in almost every corner of the map. For example, on the Mirage from the “connector,” you can see the location of the allies on the B site. And it works with absolutely any map in CS2 (CS:GO).
If you have any difficulties when setting up the radar, just reset the radar settings to default and start again. But sometimes other problems also arise, now we will consider one of them.
A common cause of this problem are updates in which the developers of CS2 (CS:GO) cut corners. If the problem arose on its own and you are sure that this did not happen because of your actions, then do the following.
Go to the map in the game in which you lost the radar and write the command in the console:
cl_drawhud_force_radar 0
If the radar does not appear, then do the following:
The system will automatically download corrupted or missing game files. Then you can go to CS2 (CS:GO) and check if the problem is solved.
In most cases, these methods help in solving this bug. But if the radar still didn’t appear, just wait a bit. Maybe the developers will soon release a patch in which this problem will be fixed.
You may think that the radar is something insignificant, but in fact, it is one of the most important tools in the game. You need to learn how to use the radar correctly to improve your game and finally get the desired Global Elite or level 10 FACEIT.
After you learn how to use the radar, it will be much easier for you to make the right decisions and win the rounds. If you find this article useful, we recommend you check out other guides on our blog.
(责任编辑:cs cases free)